
If you just got your Lenovo Legion Go, follow this comprehensive starter guide to get your new handheld up and running quickly.
The Lenovo Legion Go has been on the market for over a month now, and I've had mine for about the same duration. It's an entertaining device. I'm still contemplating whether it will become my daily go-to over the newly released Steam Deck OLED, but the experience has been positive.
For those who watched my initial Lenovo Legion Go review, you might recall a few criticisms I had. In this blog post, I'm excited to share some practical tips and tweaks that have addressed almost all of those earlier concerns.
I'll be covering around eight tips, tweaks, and accessories that are particularly beneficial for new owners of the Lenovo Legion Go and won't break the bank.
Upgrade the SSD
The Lenovo Legion Go offers two storage options: a 512-gigabyte version and a one-terabyte version. I opted for the 512-gigabyte model but have been considering an upgrade for more storage space.
I chose a one-terabyte 2242 drive for this purpose. There are two methods to replace the SSD in the Lenovo Legion Go, and I'll detail both in this post. These are the 'clean drive method' and the 'clone drive method'.
Clean Drive Method
The process is relatively straightforward for those interested in the clean drive method for upgrading the SSD on the Lenovo Legion Go. If you choose a clean drive, you will want to get your recovery media from Lenovo. Here's a quick guide on how to do that:
- Visit the Lenovo Support Site: Go to Lenovo's official support website.
- Find Your Product Details: Look for the section to view product details specific to your device.
- Access Drivers and Software: Navigate to the 'Drivers and Software' section.
- Order Recovery Media: You'll find an option to 'Order Now' under recovery media. Select this.
- Follow the Prompts: The website will guide you through several prompts. Choose 'Download Digital' when prompted.
- Prepare a USB Stick: Ensure you have a USB stick handy to complete the process.
This method is more straightforward than cloning your existing drive. For a more detailed explanation, check this Reddit guide.
Clone Drive Method
If you've already installed games or other data on your Lenovo Legion Go and want to retain this data, cloning your existing drive is the way to go. To clone your drive, you're going to need two things.
- SSD Enclosure: First, you'll need an SSD enclosure. I use the Sabrent enclosure for its tool-less design, compatibility with all M2-SSD variants (2242, 2230, 2280), fast transfer speeds, and built-in thermal pad to prevent overheating. I've had a few different M2 enclosures, and this one is my favourite so far.
- Cloning Software - Macrium Reflect: You'll need software called Macrium Reflect for the cloning process. It's a paid disk management software, but they offer a 30-day free trial. That's going to be enough for something like this. Annoyingly, you do have to register using your email address, but it's worthwhile because it will make cloning your drive easy.
Cloning Steps:
- Prepare the New Drive: Place your new SSD into the enclosure. My enclosure has a convenient nub that secures the SSD in place.
- Connect to Legion Go: Once the SSD is secured, connect the enclosure to your Lenovo Legion Go.
- Launch Macrium Reflect: Open Macrium Reflect software on your device. You should see several disks listed. In my case, I saw three: Disk 1 (the internal SSD), Disk 2 (an SD card), and Disk 3 (the new SSD in the enclosure).
- Start Cloning: Select Disk 1 (your current internal SSD) and choose the 'Clone Drive' option. Then, select Disk 3 as the target for cloning. Remember to clone all partitions and allocate extra space to the C drive, as that's where you'll want the additional capacity.
- Complete the Cloning Process: The cloning process might take around 30 minutes. Once it's finished, your new drive will be ready with all your existing data transferred.
Opening the Legion Go for SSD Replacement
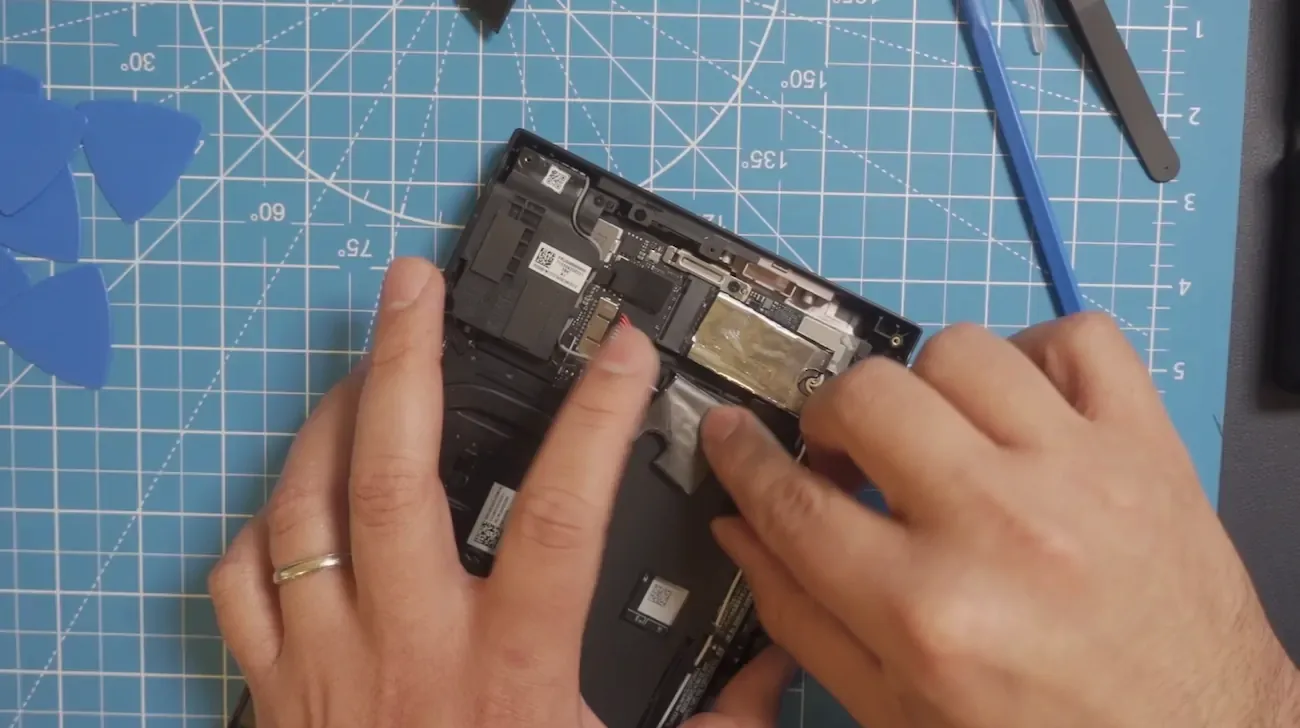
To open up the Legion Go, you'll need a reliable toolset. I used the Strebito repair kit, which includes everything necessary for the job — a screwdriver, a magnetic panel, a selection of pry tools, and tweezers. The tweezers turned out to be particularly handy.
- Begin by unscrewing the six screws on the Legion Go's back plate. The trickiest part is removing this back plate. It requires some patience. You start by opening up the kickstand and prying your way around, beginning at the bottom notch. Persistently working your way around the entire back plate is key. A word of caution: the power button might get pressed accidentally during this process, so consider draining the battery before you start.
- Once you have the back plate off, the next step involves the battery. There's a sticker attached to the battery connector, which you can use to help disconnect it. I'll be honest: I found disconnecting the battery challenging and ended up skipping this step, but I recommend trying to do it if you can.
- Next, focus on the SSD. It's covered by another sticker you'll need to remove – this is where the tweezers come in handy. After removing the sticker, unscrew and remove the SSD. The SSD is in a little sleeve, which must be carefully removed and applied to the new SSD. Once you've got the new SSD in its sleeve, plug it in, screw it down, and reapply the battery sticker. If you managed to disconnect the battery earlier, reconnect it now.
- Finally, reattach the back plate, screw in the six screws, and boot up your Legion Go. With some patience and careful work, you should now have significantly increased storage space in your device.
This process took me about 90 minutes. 30 minutes for the cloning and 60 minutes for the opening and replacing parts. The most challenging part was removing the back plate, but the rest is relatively straightforward once that's done. And now, I'm enjoying a one-terabyte Legion Go, which is pretty satisfying.
Essential Software Tweaks for the Lenovo Legion Go
I want to highlight some essential software tweaks you should consider if you haven't already. These tweaks are crucial for optimising your device's performance.
The first one is about updating the drivers. The Lenovo Legion Go team is doing a great job in providing updates (and they plan to enable over-the-air driver updates using Legion Space, but that's not available yet). It's on the roadmap. Until then, you need to visit the dedicated site for Lenovo Legion Go drivers to download the latest.
Another important aspect I overlooked in my review is setting the OS power mode to efficiency for almost all scenarios. This advice came after speaking with Cary, aka ThePhawx. The OS power mode has three settings: performance, balanced, and efficiency.
It's a bit counterintuitive because you might think 'performance' means more power to your graphics, but it refers to CPU power. So, set it to efficiency to allocate less power to the CPU, allowing more power for the GPU. This setting is optimal for gaming. However, switch it back to performance if you're doing something CPU-heavy like emulation. Remember that for gaming, efficiency usually offers the best experience.
4GB VRAM on the Lenovo Legion Go
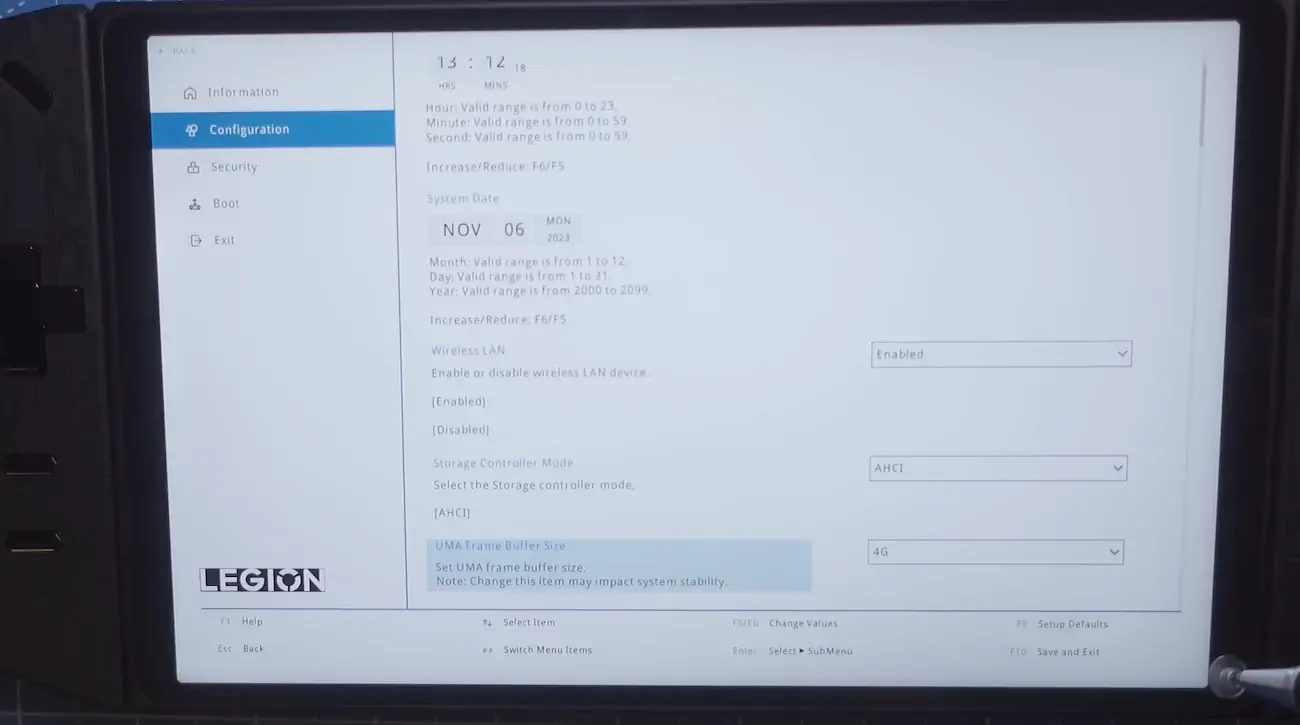
The final software tweak I recommend for the Lenovo Legion Go involves adjusting the VRAM, which you can do directly in the BIOS. Here's how you can access and modify these settings:
- Accessing the BIOS:
- First, completely turn off your Lenovo Legion Go.
- To enter the BIOS, press and hold the volume plus button while simultaneously pressing the power button. This will boot your device into the BIOS.
- Modifying VRAM Settings:
- Once in the BIOS, navigate to the 'BIOS setup' and then to the 'More Settings Configuration'.
- Look for the option labelled 'UMA Buffer Size'. Here, you can adjust the VRAM setting.
- Set the VRAM to four gigabytes, the current maximum available through the standard BIOS.
Many users are interested in setting the VRAM to six gigabytes. While this option is not currently available in the standard BIOS, it's in the pipeline and should be released soon.
There is a beta version of the BIOS where six gigabytes of VRAM are available, but I advise caution with beta BIOS versions. Unless you are experienced with such updates, waiting for the official release is better.
Essential Accessories for the Lenovo Legion Go
Dbrand Skins
Another issue with the Lenovo Legion Go is its matte plastic surface, which is prone to smudges. Fortunately, I found the perfect fix: Lenovo Legion Go skins from Dbrand. As I've experienced with the numerous skins I've applied and removed from my Steam Deck, Dbrand's products are super high quality. The Steam Deck still feels brand new, thanks to these skins.
Applying skins to the Legion Go is even more straightforward, partly due to its separate controllers. The skins enhance the look of the device and feel nice in the hands. The 'Triple Black' skin I chose is subtle but reveals its texture under the light. It's ideal for those who prefer a more muted style. However, Dbrand offers a range of other designs, too, like 'Acid', 'Obsidian', 'Magma', 'Sea Breeze', and many more.
To further protect your device, you can also get the Lenovo Legion Go glass to protect the screen.
TomToc Carrying Bag
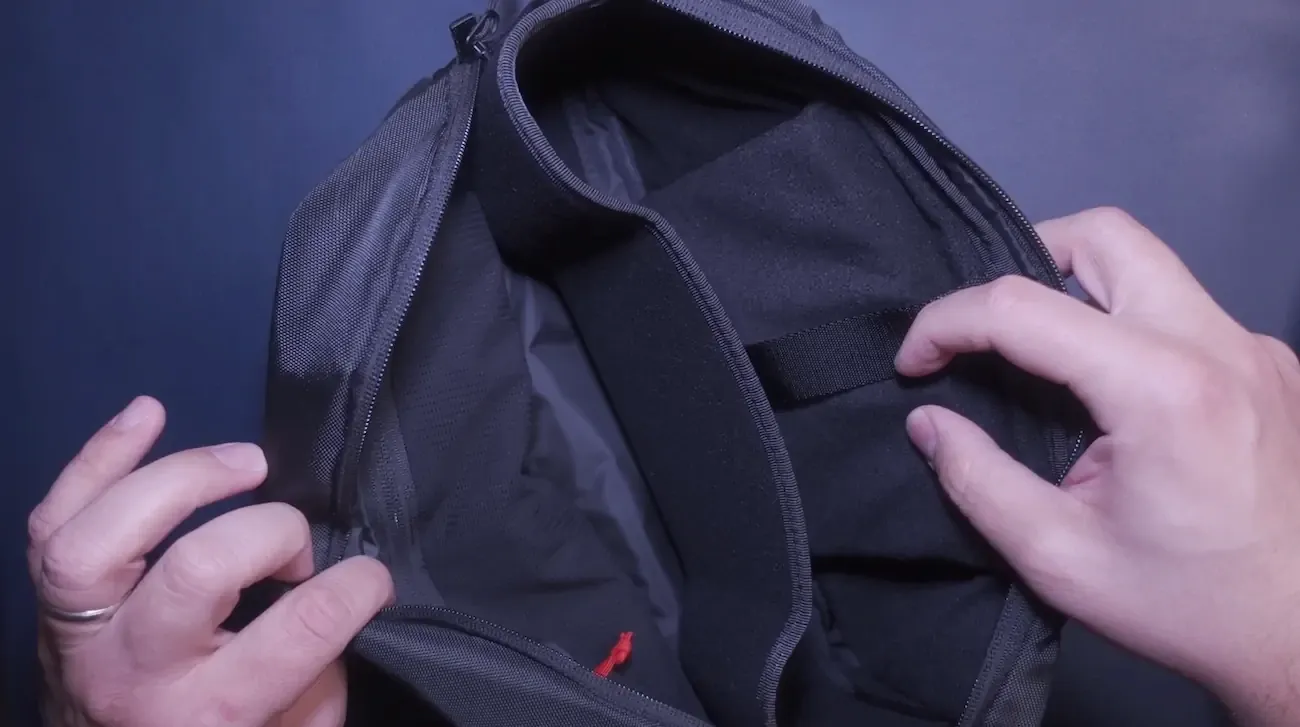
In my review of the Lenovo Legion Go, I had a few reservations about the case that comes with it. While the provided case is good, its storage capabilities are limited. It stores the Lenovo Legion Go itself, along with the base for the mouse and the analogue stick, but lacks the space for additional accessories, such as the power brick.
Due to these limitations, I frequently opt for my TomToc bag. It holds almost any handheld I have and comfortably accommodates the Lenovo Legion Go, one of my largest handhelds. It's incredibly durable and versatile, but now they've updated the divider to be firmer, giving even more protection to the handheld inside the bag.
And I can carry around all my accessories like a power brick, earbuds in their carrying case, a base for the mouse, a USB-C charging case and cable, a lightning charging cable, and I keep a screen wipe and some USB accessories, too. These bags have fantastic quality and offer a two-year warranty on their products.
Ugreen Power Adapter
Continuing with my recommendations for enhancing your Lenovo Legion Go experience, let's touch upon another accessory that addresses a concern I mentioned in my initial unboxing – the power brick. While functional, the original power brick for the Lenovo Legion Go has limitations: it lacks collapsible prongs and a detachable cable, and it is limited to a 65-watt output.
To overcome these issues, I switched to the Ugreen power adapter, which has been a much better choice for me. Firstly, it offers faster and more efficient charging, thanks to the incorporation of GAN technology. This technology allows you to charge both your phone and the Lenovo Legion Go simultaneously and still achieve a quicker charge than the default adapter provided with the device.
The Ugreen adapter also features three USB-C ports and one USB-A port, making it incredibly versatile. Another benefit is using any USB-C cable, as the adapter supports detachable cables. Ugreen's braided cables are excellent – I use their USB-C and lightning cables.
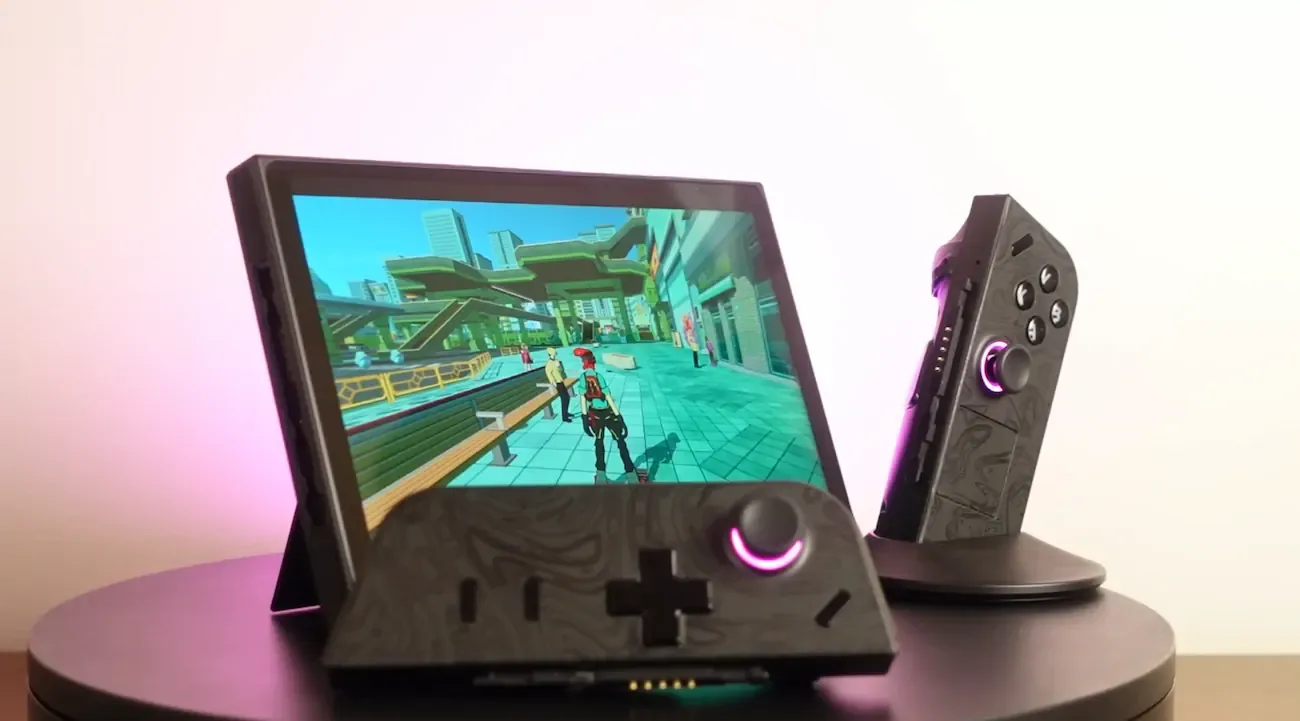
Portrait Gaming on the Lenovo Legion Go
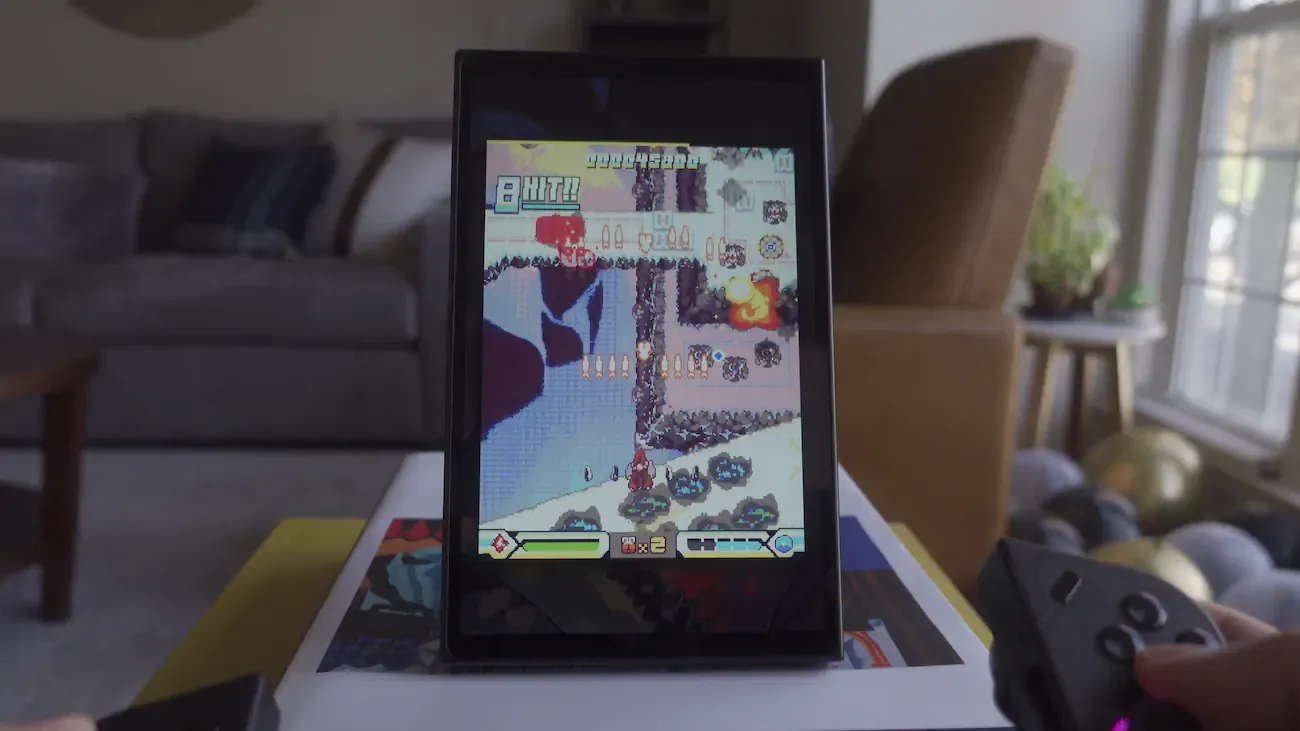
I also want to showcase a feature of the Lenovo Legion Go that might not be immediately obvious but is cool: its suitability for playing games in Tate mode, or Portrait mode. This device excels at vertical schmups like 'Ikaruga', 'Blue Revolver', or 'DoDonPachi Resurrection'. But it's not just shooters; games like 'Downwell', 'Thumper', and 'Demon's Tilt' also support Portrait mode gameplay.
The Lenovo Legion Go, in particular, is good at this because the controls are removable. And because the controls are removable, you can stand the tablet up in Portrait mode using the same kickstand. Of course, it's not going to have the same range as when you're using the kickstand in landscape mode, but it does work. And I've played Blue Revolver quite a bit with it, and it's pretty awesome.
However, it's worth noting that some of these games might take some extra work to get them to play in Portrait mode, but it can be worth it depending on what you're playing.
Lastly, I want to emphasize that there's much more to come with the Lenovo Legion Go. The Lenovo engineers are transparent and actively working on updates and improvements, often putting in late nights and weekends to implement requested features. Moreover, the community is also contributing, with initiatives like Handheld Companion developing versions of their app specifically for the Legion Go.
So, there are indeed exciting times ahead for this device! I hope this guide was of use.