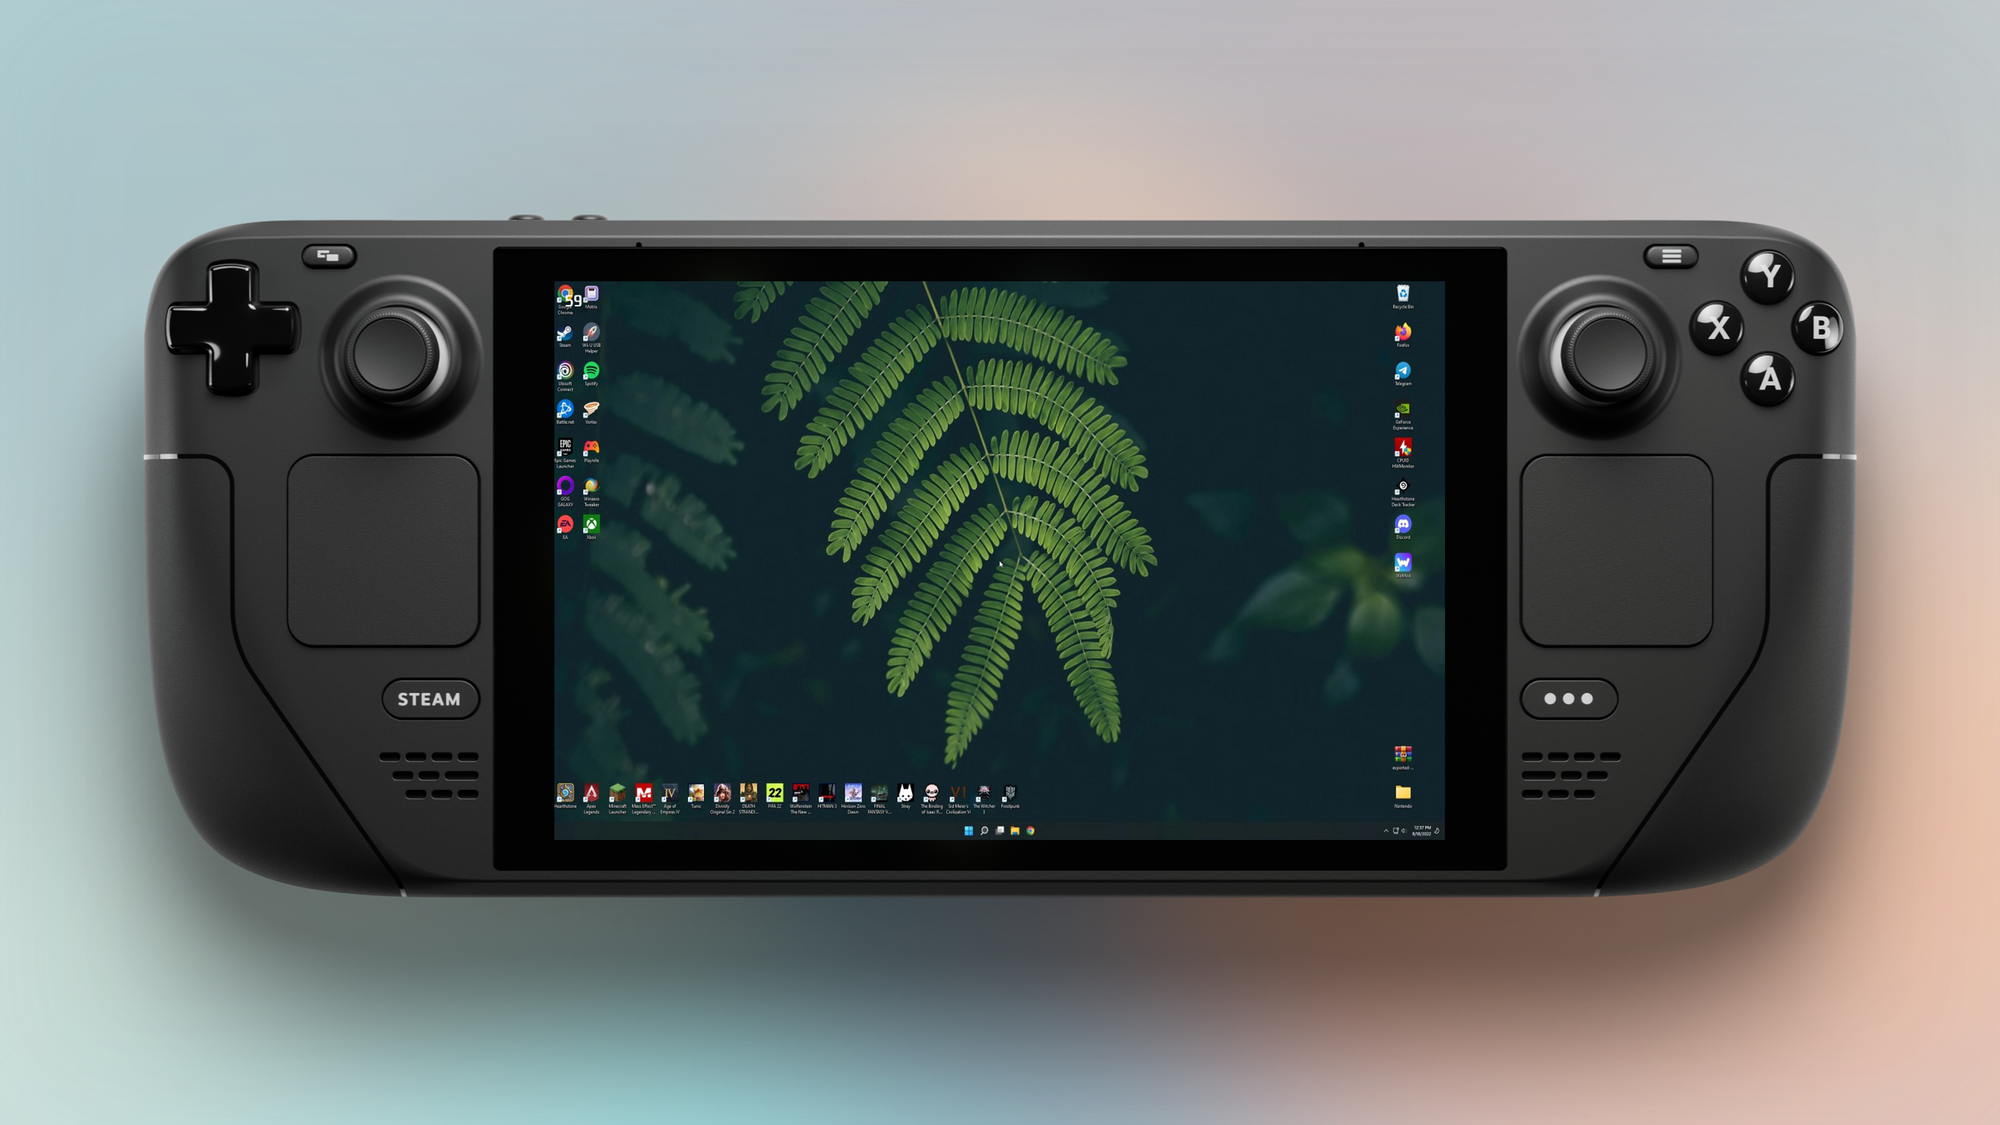


It’s a meme by now, but for the sake of this blog post, it needs to be repeated: The Steam Deck is a PC, and while it resembles a Nintendo Switch, it is not.
This means that, unlike on the Switch, games are seldom (or never) optimized for the Steam Deck out of the box. That is up to you.
While some games are so low-demanding performance-wise that they will run at a stable 60 frames per second without problems, other games need much more involvement from your side.
So understanding your options is pretty important to get the best possible gameplay experience.
But first:
The Steam Deck Screen Resolution explained
The Steam Deck has a seven-inch screen with a resolution of 1280-by-800 pixels at an aspect ratio of 16:10.
However, most games don't support this ratio but favour the more commonly used 16:9 ratio at a 1280-by-720 resolution (commonly referred to as 720p).
This means that most games running on Steam Deck are letterboxed, so there will be black bars along the top and bottom of the screen.
But the resolution a game runs in is not the only variable when optimizing a game.
The Steam Deck Performance overlay
Thankfully, Valve included a native performance overlay showing how a game is running in detail. To enable it, press the Quick Access button (that's the one on the right side with the three dots (•••)) and go down to the battery icon. Under Performance Overlay Level, you’ll find different settings, and the higher the level, the more detailed the overlay.
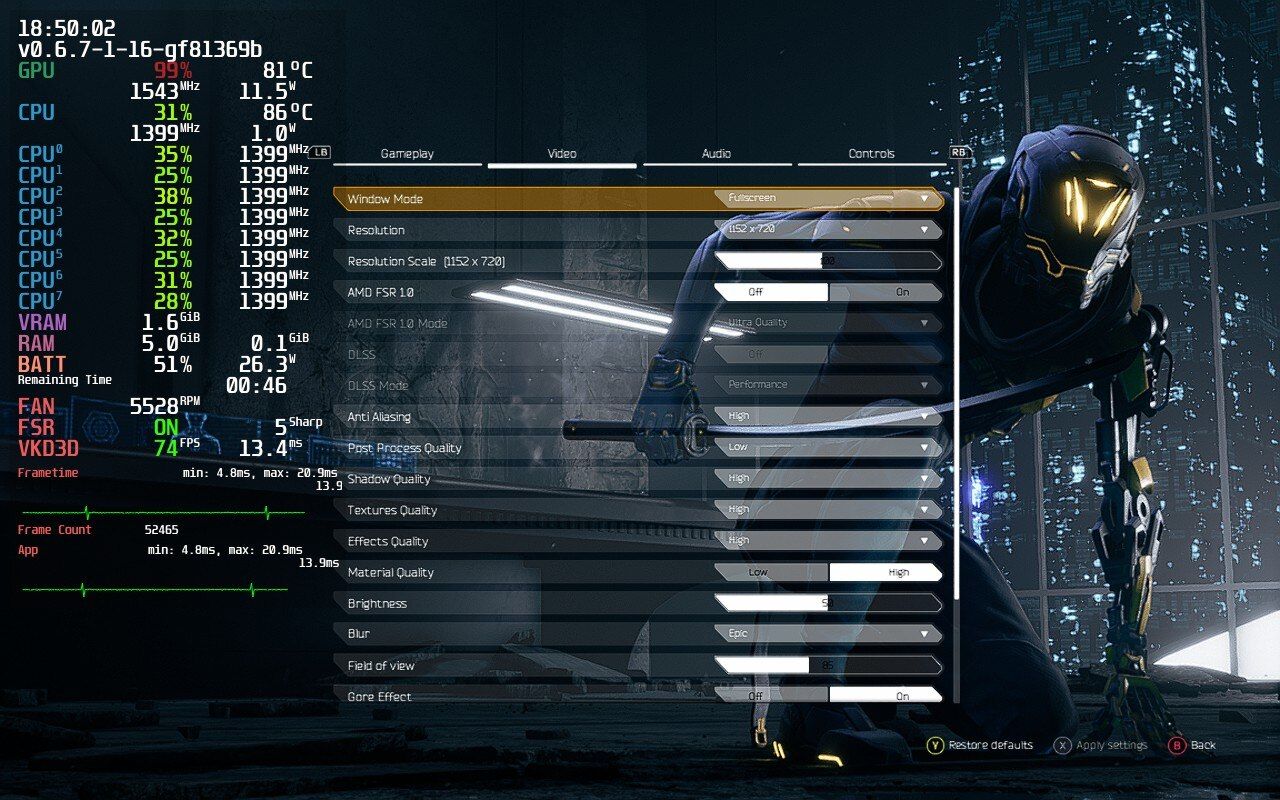
But how do we read that layer? Look at the screenshot below. (That’s Level 4, by the way. I mostly spend my time in level 2 to set everything up and then in level 1 for gameplay.)
Update: Valve changed the way Level 2 is displayed. It now fills in the top part of the screen, where most games display a black par due to their aspect ratio (see the part about the resolution at the top). This is a welcome change, as now you don't have that information overlapping the game.
Here you see a few things:
- The GPU (graphic card) and CPU (processor, in this case per core) usage in percentage
- VRAM (video memory) and RAM (memory) usage
- The battery life, remaining time (when the Steam Deck will turn off) and its wattage
- Fan speed, represented in rotations per minute
- If FSR is enabled (more below) and what sharpness level is set (for this example, set to 5)
- Under Gamescope, you see the frames per second (FPS)
- And most importantly, the frametime
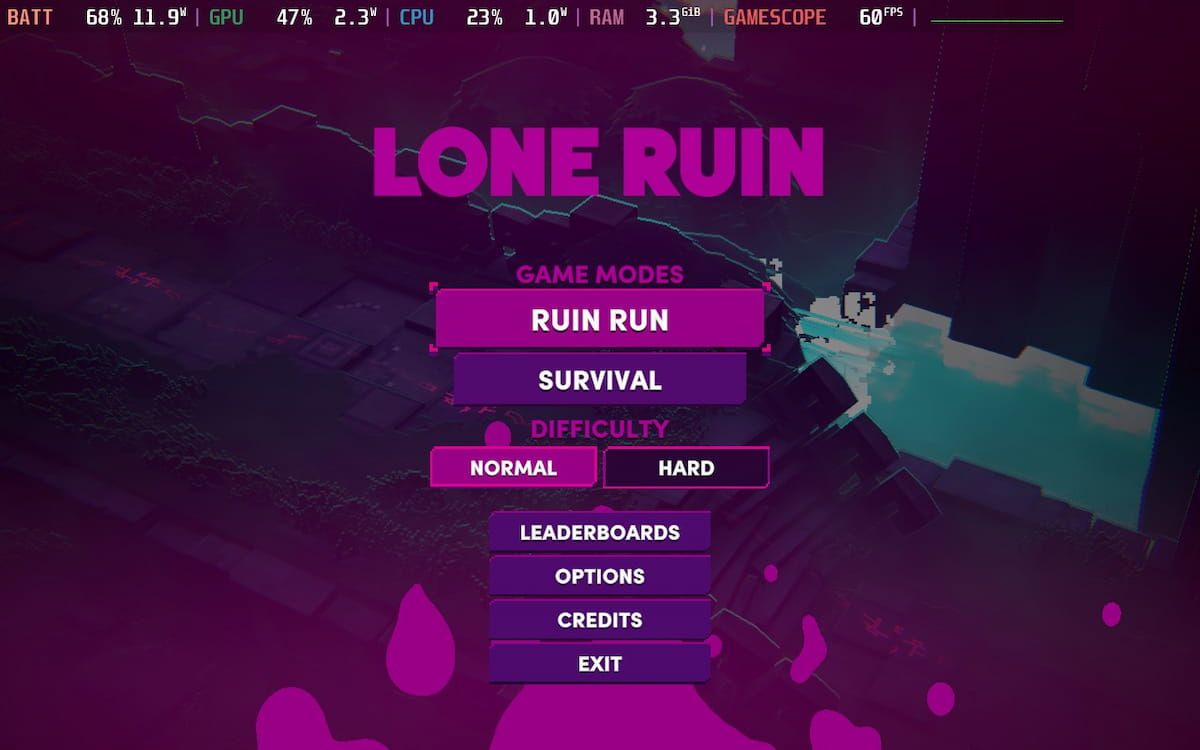
Here is another screenshot (level 2):
The frametime in the screenshot is represented by the green line. It measures the time it takes for a game to display the next frame in milliseconds. The frametime graph is an exact reading where FPS is only an average.
You want that line to be perfectly flat. Every spike, be it upwards or downwards, results in shakiness. So even though your game might reach a higher FPS count, if the line isn’t flat, it will just feel worse.
How to use the FPS Limiter
This is where the FPS limiter comes into play. Press the Quick Access button (that's the one on the right side with the three dots (•••)) and go down to the battery-icon. Under Performance Overlay Level switch to Advanced View.
You should be able to see the Framerate Limit now. Here you have the choice between a multitude of options. By default, you see 15 FPS, 30 FPS, 60 FPS, and Off with Off being uncapped FPS — meaning the Steam Deck will not limit frames per second. On the Deck, this option doesn’t make a lot of sense, but if you hook your Deck up to a monitor that supports more, you can try this.
While 60 FPS is the optimal experience, it sometimes just isn’t achievable. Either because a game can’t sustain it, which brings us back to the frametime graph, or because it eats through battery life like nothing. This is where you usually want a lower option like 30 FPS.
But there’s one more slightly hidden option that has become the holy grail of the Steam Deck community. If you switch your refresh rate (displayed in Hz, Hertz) to 40, you unlock the option to set your Steam Deck to 40 FPS.
Now, don’t misunderstand. While 40 FPS seems closer to 30 FPS, it is not. Digital Foundry has the best explanation, but let me try to explain.
Look at this image:
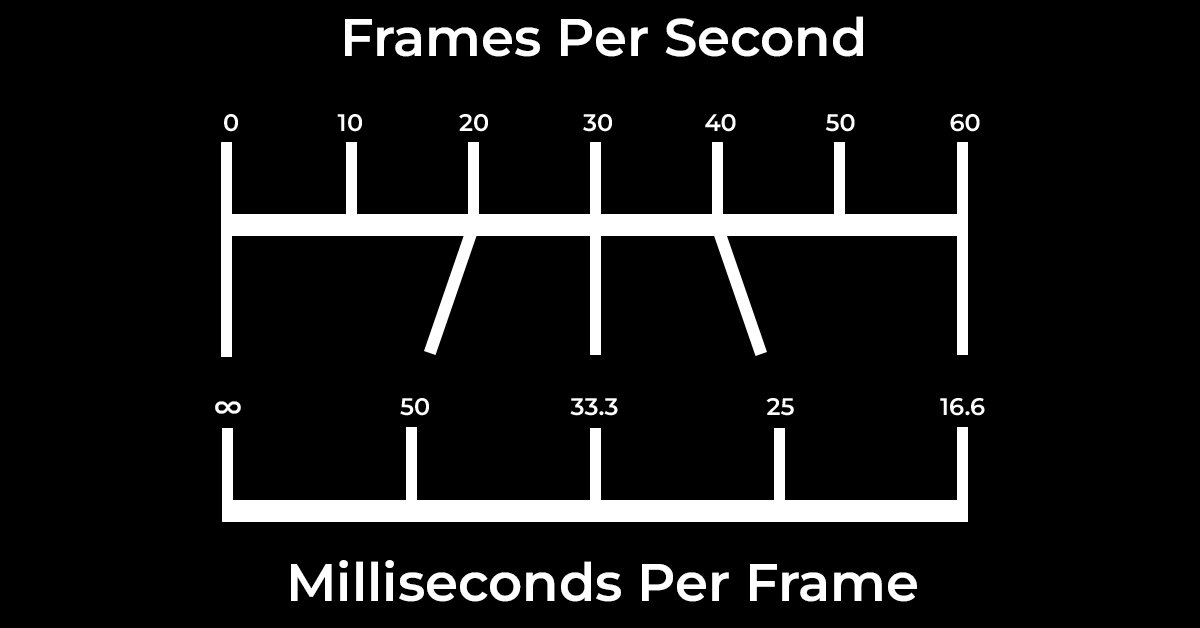
What you see here is how often a game updates its frame. While a 60 FPS game updates every 16.7 milliseconds and a 30 FPS game updates every 33.3 milliseconds, you’ll see at 40 Hz/FPS, a screen refreshes every 25 milliseconds.
Do the math, and you’ll see it’s precisely in the middle between 30 and 60 FPS. And the quicker a game updates, the more input lag improves. And what that means is: it’s visually smoother.
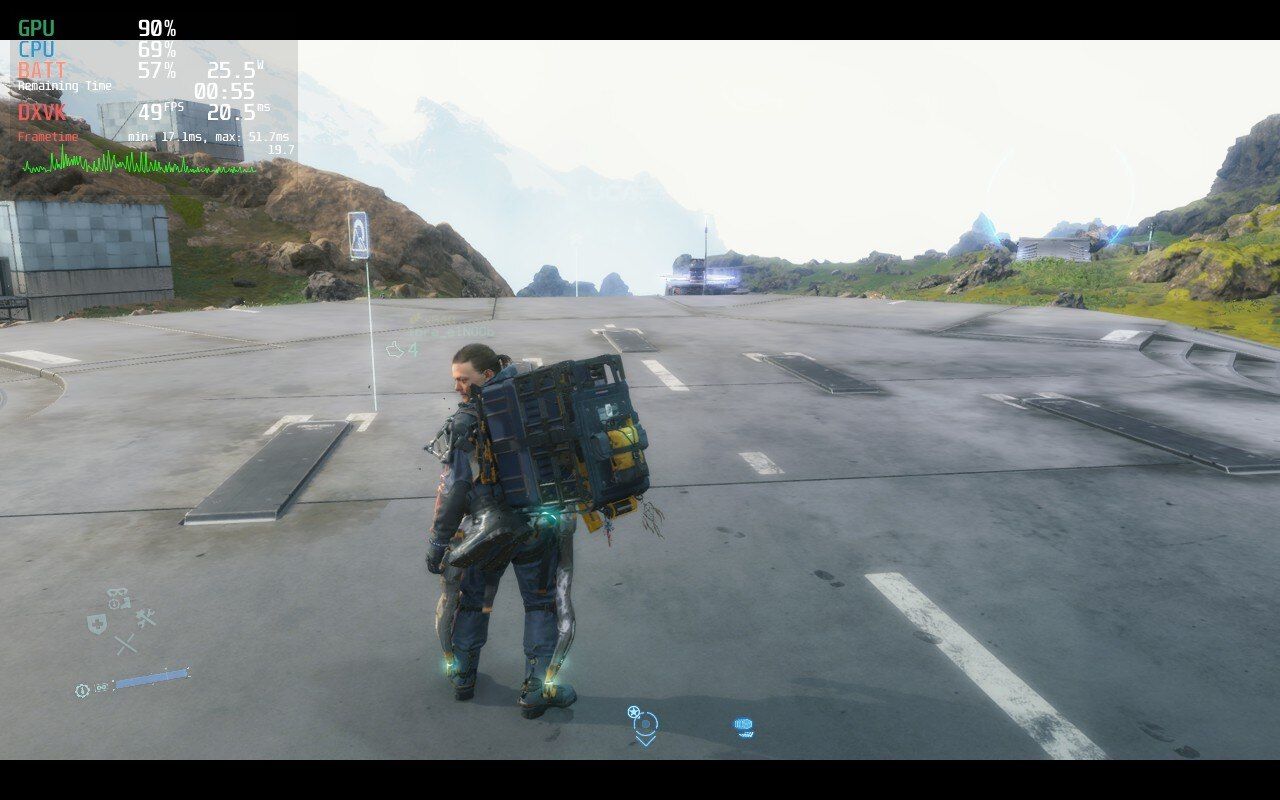
Setting FPS to 40, and looking back at the frametime, see how it completely smoothed out (in the screenshot, I forgot to change Frametime Limit to 40, but because of the fixed Refresh Rate, we achieve the same goal):
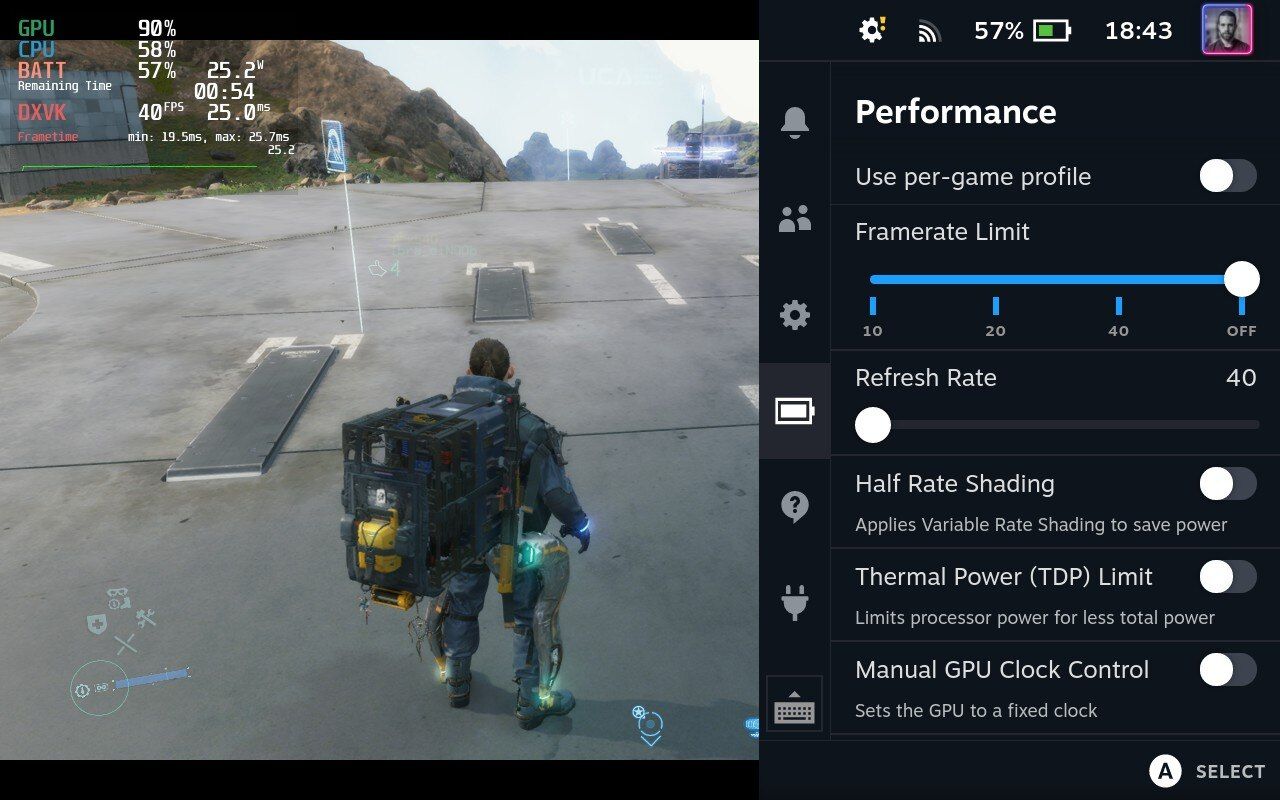
This is what we want. Compared to the screenshot above, I hit a lower FPS number, but the game feels much smoother.
Also, see that little Use per-game profile toggle? That one saves your settings per game, so you can customize everything based on what you are playing.
TDP: Power equals heat
Being a portable device, the Steam Deck is limited by its TDP, TDP standing for thermal design power. The TDP number tells you the maximum heat the processor and graphics cards of the Steam Deck can use in watts.
More watts equals more power, and more power equals better performance, though more power also equals more heat and power consumption.
On the Steam Deck, you can limit TDP via the Quick Access button (that’s the one on the right side with the three dots (•••)). This will give you better battery life. However, performance in some games will suffer. The trick here is to find the perfect balance between performance and battery life. It also helps to dial down graphic settings in games.
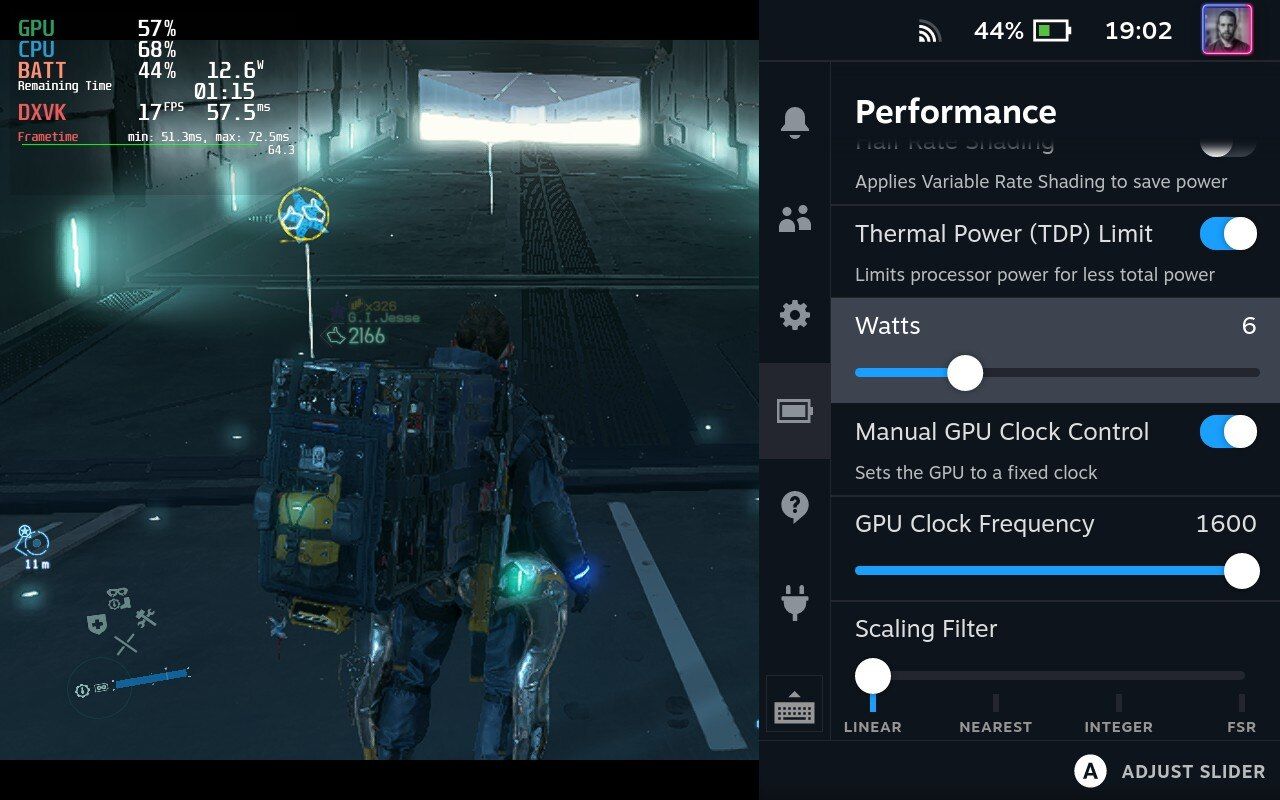
One option would be to limit TDP, so you still get stable frames while conserving battery life. Remember, look at the frametime, FPS and CPU percentage.
And a little side-note: you can manually set your GPU Clock Frequency, a setting to control how fast the GPU should run. To save battery life, check your GPU usage, and lower the frequency if you have room to spare. So, if your GPU usage is at, let’s say, 30 per cent, decrease the clock frequency. Your usage in percentage should now be higher, but you’ll save battery life by using less power.
Then there is FSR
Next, you have AMD FSR. FSR stands for “Fidelity FX Super Resolution” and is a rendering technique that runs games at a lower resolution and then uses AI algorithms to upscale games back to a higher resolution. You mostly want to run this with graphically intensive games.
You have to set your game resolution to something lower than the Steam Deck’s 800p (1280 x 800px) to enable it, for example, at 540p.
If you then set your Scaling Filter to FSR, you can choose how much sharpening you want FSR to apply. This is primarily a subjective change. Some people are ok with a lower resolution and higher sharpening, others are not.
What is Half Rate Shading?
One more option to gain battery life is the usage of Half Rate Shading.
What this toggle enables is Variable Rate Shading (VRS). But understanding Variable Rate Shading is akin to rocket science. Let me try to explain.
Think of it like this: a pixel has specific characteristics that need to be calculated. Calculating these characteristics for every pixel individually is resource-heavy. What Variable Rate Shading does is tell the GPU: “hey, look at these pixels as a group and just apply the same characteristics.” Often VRS is applied intelligently on groups of pixels which are not necessarily “important”. It’s content-aware and knows what not to touch, not to make a game look like shit (e.g. faces).
Valve’s Half Rate Shading, however, is a brute-force method. It doesn’t try to be intelligent about its usage of VRS but applies it to two pixels at a time, no matter the content. This can, occasionally, result in worse-looking games.
This is why I don’t bother with Half Rate Shading at all. It’s meant to save battery life but not necessarily improve performance — and frankly, I prefer graphics to battery life, but that is strictly a personal taste.
Turn this on if you're on the go and can live with the visual changes.
The rest is in-game
While these settings help tremendously to get a smoother game performance or a better battery life, there is one more place you need to check: in-game graphic settings.
Now, changing these is dependent on a large number of factors. For newer AAA titles, you need to downgrade visual performance to Medium, if not Low. For older games, you can experiment with higher settings.
Fortunately, there is a website sharing community-tested graphic settings:


Depending on what mix of performance and battery life you want, you should find your answer on Sharedeck. Also, I can recommend Protondb for additional settings.
However, in general, the few values you want to downgrade first are Shadow quality, Reflection quality, Antialiasing, and Distance rendering.
And if the game looks like crap?
If you changed all your settings, the game finally runs smoothly but still looks bad?
Then you have one more option if you have a Gaming PC: stream the game. Here’s how.